
Monero (XMR) is a Cryptonote calculation based digital money, it depends on Ring Signatures to give a specific level of security when making an exchange. Monero is a Proof of Work cryptographic money that can be digger with computational influence from a CPU or GPU. There are presently no ASICs for Monero, which implies that anybody with a PC can mine it.
The main thing you have to consider is whether you will mine performance or on a pool. Mining on a pool typically accompanies an expense yet additionally has it's favorable circumstances. Clients that don't have enough computational power may need to hold up drawn out stretches of time before getting a reward, in a pool clients pull their endeavors together so as to decrease difference and have a consistent stream of salary. Clients that have enough equipment or basically need to mine performance can likewise profit by solo pools which work similarly as ordinary solo mining, yet don't expect clients to run a full hub or store the whole blockchain. We will utilize MoneroHash for this guide, yet you can utilize any pool you like.
Investigate our Mining Pools area to look at pool highlights, charges and audits.
Today we will demonstrate to you industry standards to mine Monero on a Mining Pool.
AMD Graphic cards are ideal for Monero Mining, however you can likewise mine it with a Nvidia GPU or CPU. To enable clients to get the most benefit for their particular equipment we will utilize an alternate programming that was made for each of this choices.
Part 1 - CPU Mining
Step 1: Download the mining software. For this section of the guide we are going to use Wolf's CryptoNote open souce CPU Miner, since it's the one that has the provides the best results. You can find download link here.

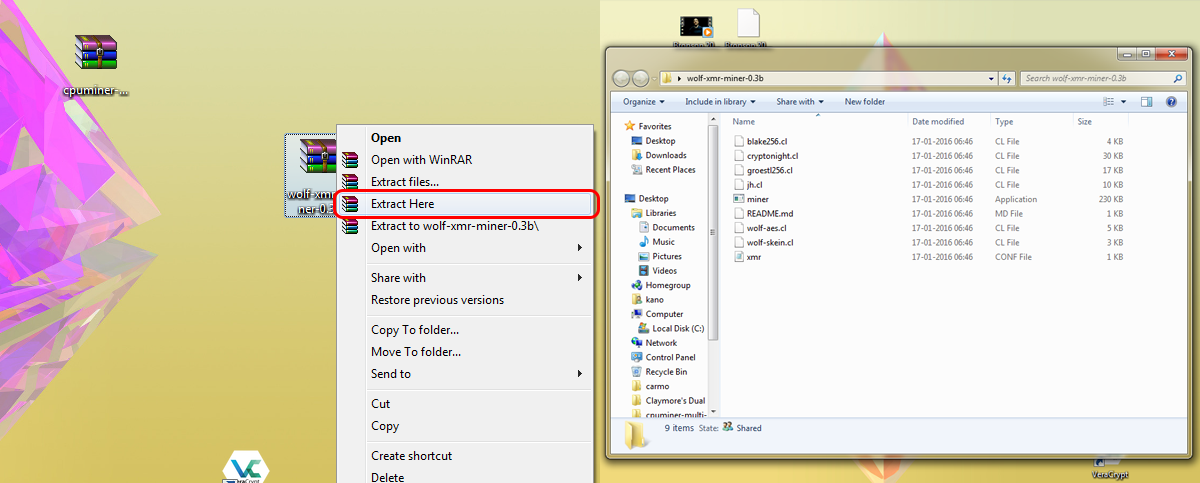
Step 2: Extract the .zip file. You will be left with a folder like the one below.

Step 3: Now, inside the miner folder we have just extracted from the .zip file, you'll need to hit ctrl + right mousekey. By doing this you'll be given an extra option "open command window here", click it and a command line window will appear.

Step 4: Now that our command line window (miner) is ready to go, all we need to do is type in the command: "minerd -a cryptonight -o stratum+tcp://monerohash.com:3333 -u YOUR_WALLET_ADDRESS -p x". You have to replace "YOUR_WALLET_ADDRESS" for your actual XMR wallet adress.

You are now mining Monero! You can view all of the commands available by typing "minerd --help". In our case we're just using the -a command, which stands for algorithm, the -o stands for server, the -u is your wallet address and the -p is your password, which can be left with an x when the Mining pool does not require you to login.

Part 2 - AMD GPU Mining

Step 2: Extract the .zip file. You will be left with a folder like the one below.
Step 2: Now you'll need to configure the xmr.conf file, open the file with the note pad and change "url": "stratum+tcp://xmr.poolto.be:3000" to your pool address, in this case: "stratum+tcp://monerohash.com:3333". Replace the user with your wallet, in this case: "user": "45hVQbLnspDDViJeMc1v6mFPjKmJ38geKVZFRgFXxV1pVSDpG8jz4LfTmkvhgj9sPwjA1ZLJD9d3xTUF982Uk7poL2Ka94z".

Step 4: Once xmr.conf file is configuredyou need to go inside the miner folder we have extracted from the .zip file and hit ctrl + right mousekey (For windows 10 to get the extra options you need to hold shift+right mousekey). By doing this you'll be given an extra option "open command window here", click it and a command line window will appear.

Step 5: Now that our command line window (miner) is ready to go, all we need to do is point the miner to the xmr.conf file. type: "miner xmr.conf"

And that's it, you are now mining with your AMD GPU, which will surely give you the best results when mining XMR. If you get a "clCreateBuffer" error, lower your raw intensity in the xmr.conf file:" rawintensity ": 1336
Part 3 - Nvidia GPU Mining

Step 2: Extract the .zip file. You will be left with a folder like the one below.

Step 3: Now, inside the miner folder we have just extracted from the .zip file, you'll need to hit ctrl + right mousekey(For windows 10 to get the extra options you need to hold shift+right mousekey). By doing this you'll be given an extra option "open command window here", click it and a command line window will appear.

Step 4: Now that our command line window (miner) is ready to go, all we need to do is type in the command: "ccminer -o stratum+tcp://monerohash.com:3333 -u YOUR_WALLET_ADDRESS -p x". You have to replace "YOUR_WALLET_ADDRESS" for your actual XMR wallet adress.

That was the last step. You are now mining Monero with your Nvidia Graphic Card. As you can see, mining Monero is possible with any hardware, even a CPU! So why not give it a try?
Part 4 - Easy Mining with any hardware
In this section we'll use Minergate, an easy to use cryptocurrency miner that allows you to mine several cryptocurrencies with a single click!
Step 1:The first thing you’ll need is an account on www.minergate.com. MinerGate has its own built-in wallet in order to allow users to start mining even if they don’t have a wallet address set up, so in order to protect your funds, we advise using a strong password and activating 2FA (2 factor authentication), 2FA will make sure no one can acess your funds even if they know your password. Remember, the safest place to store your funds is in your own wallet.

Step 2: Next you need to download the Mingergate software and install it, the website will detect your operating system and present you with the correct version. Install and run MinerGate.

Step 3: After you open and install the setup, you’ll be presented with the option to start smart mining. MinerGate automatically detects your equipment and chooses the most profitable cryptocurrency to mine according to your hardware, market price and difficulty. For most computers this will be Monero, so you can click "Start smart mining".

You can choose how many cores you want to use in your CPU and GPU, if you have one. If smart mining takes you to another cryptocurrency, you can always choose monero manually, as so:

That's it. Easy, right? Minergate prouds itself on being so! And you can use their GUI miner for other cryptos like Ethereum and Ethereum Classic. Good luck!


